Products
The Products menu is used to manage all goods or services sold in the JOVA POS application.
Good product management will:
- Make sales transactions easier
- Reduce pricing errors
- Help with stock management
- Make sales reports more accurate
Product Menu Functions
The Products menu has the following main functions:
- Adding new products
- Changing product data
- Deleting unused products
- Managing product prices and stock
- Grouping products by category
Product Page View
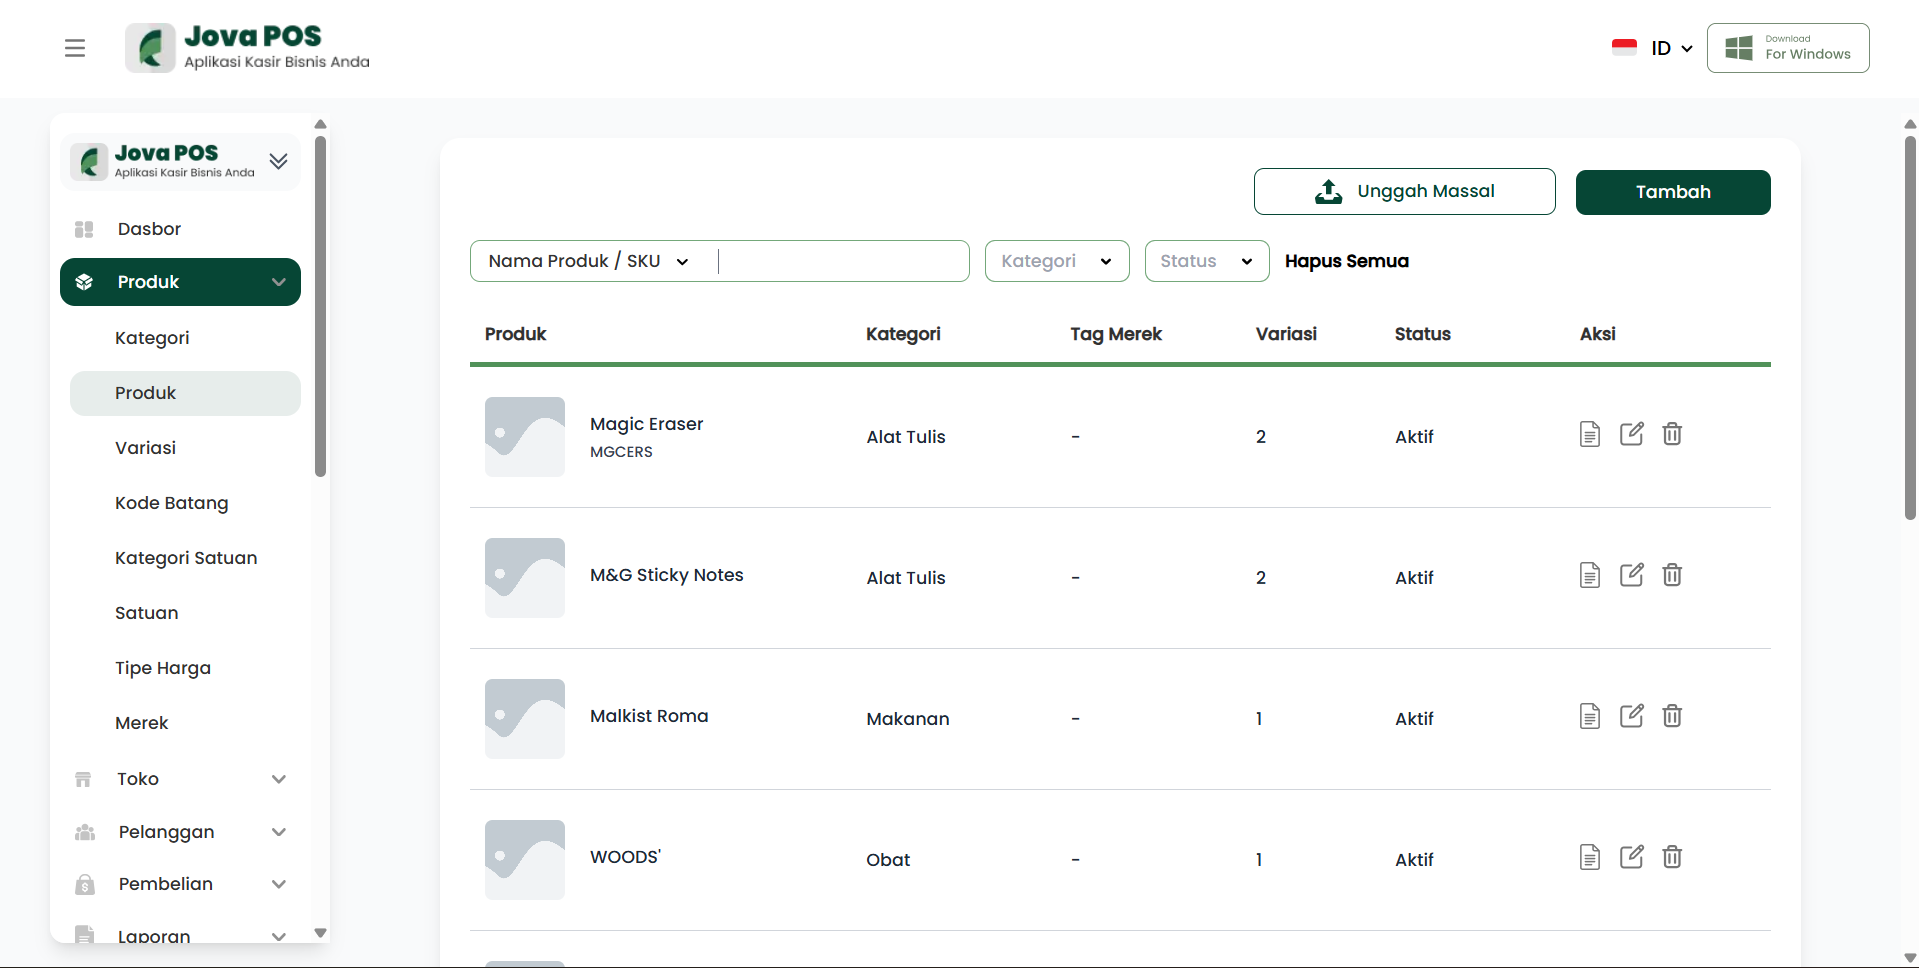
Product Page Sections
1. Product List
This section displays all products registered in the system.
Information typically displayed:
- Product Name
- Product Category
- Selling Price
- Product Stock
- Product Status (active/inactive)
Product list functions:
- View available products
- Check prices and stock
- Ensure product data is correct
2. Product Search and Filter
The search and filter feature is used to help users find specific products.
Common filter types available:
- Product name
- Category
- Product status
Benefits of this feature:
- Saves time
- Reduces errors during transactions
- Simplifies data management
3. Add Product Button
This button is used to add a new product to the system.
When to use?
- When there is a new product
- When starting a new business type
4. Edit Product Button
Used to:
- Change the product name
- Move the product to another category
5. Delete Product Button
Used to delete products that are no longer sold.
Products that have been used in transactions usually cannot be deleted, only deactivated.
Adding a New Product
Steps to Add a New Product
-
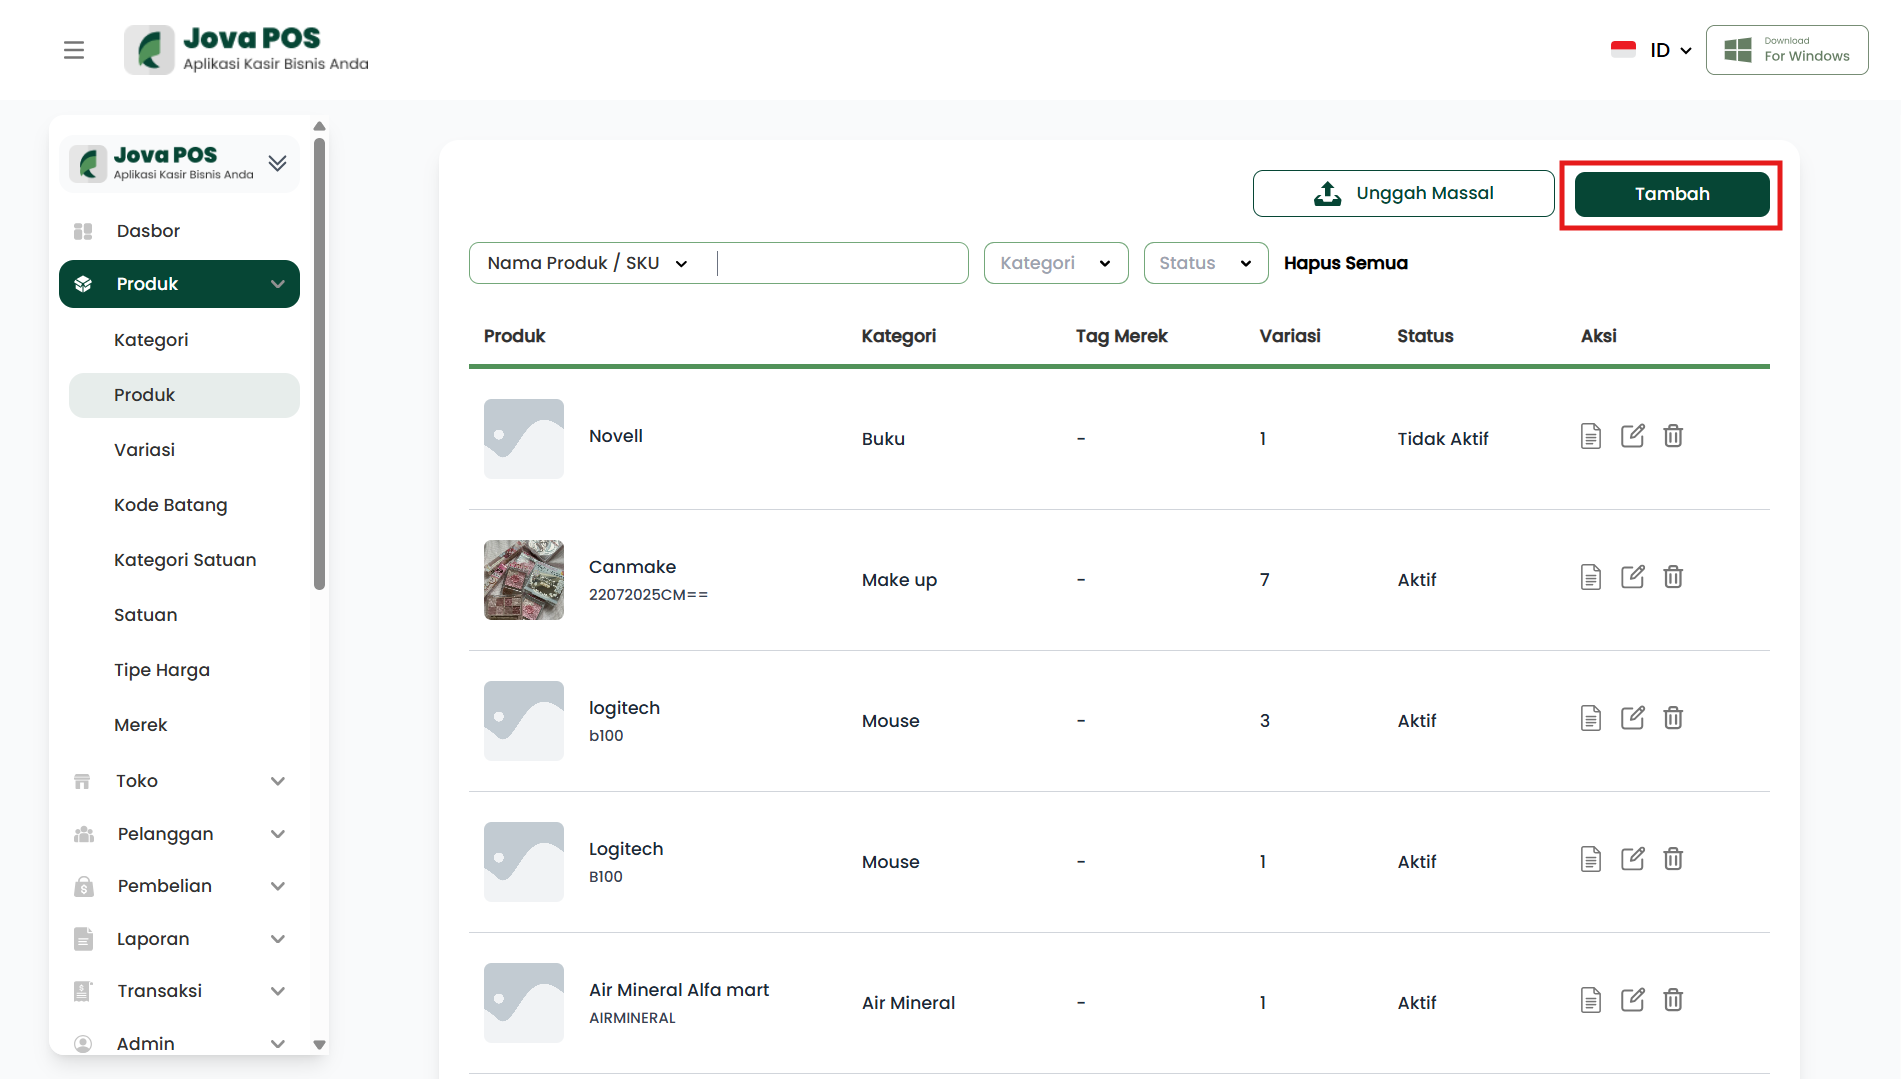
Click Add Product
- On the Products page, click the Add button at the top right.
-
Fill in the Product Form
- Fill in the form with the required product information.
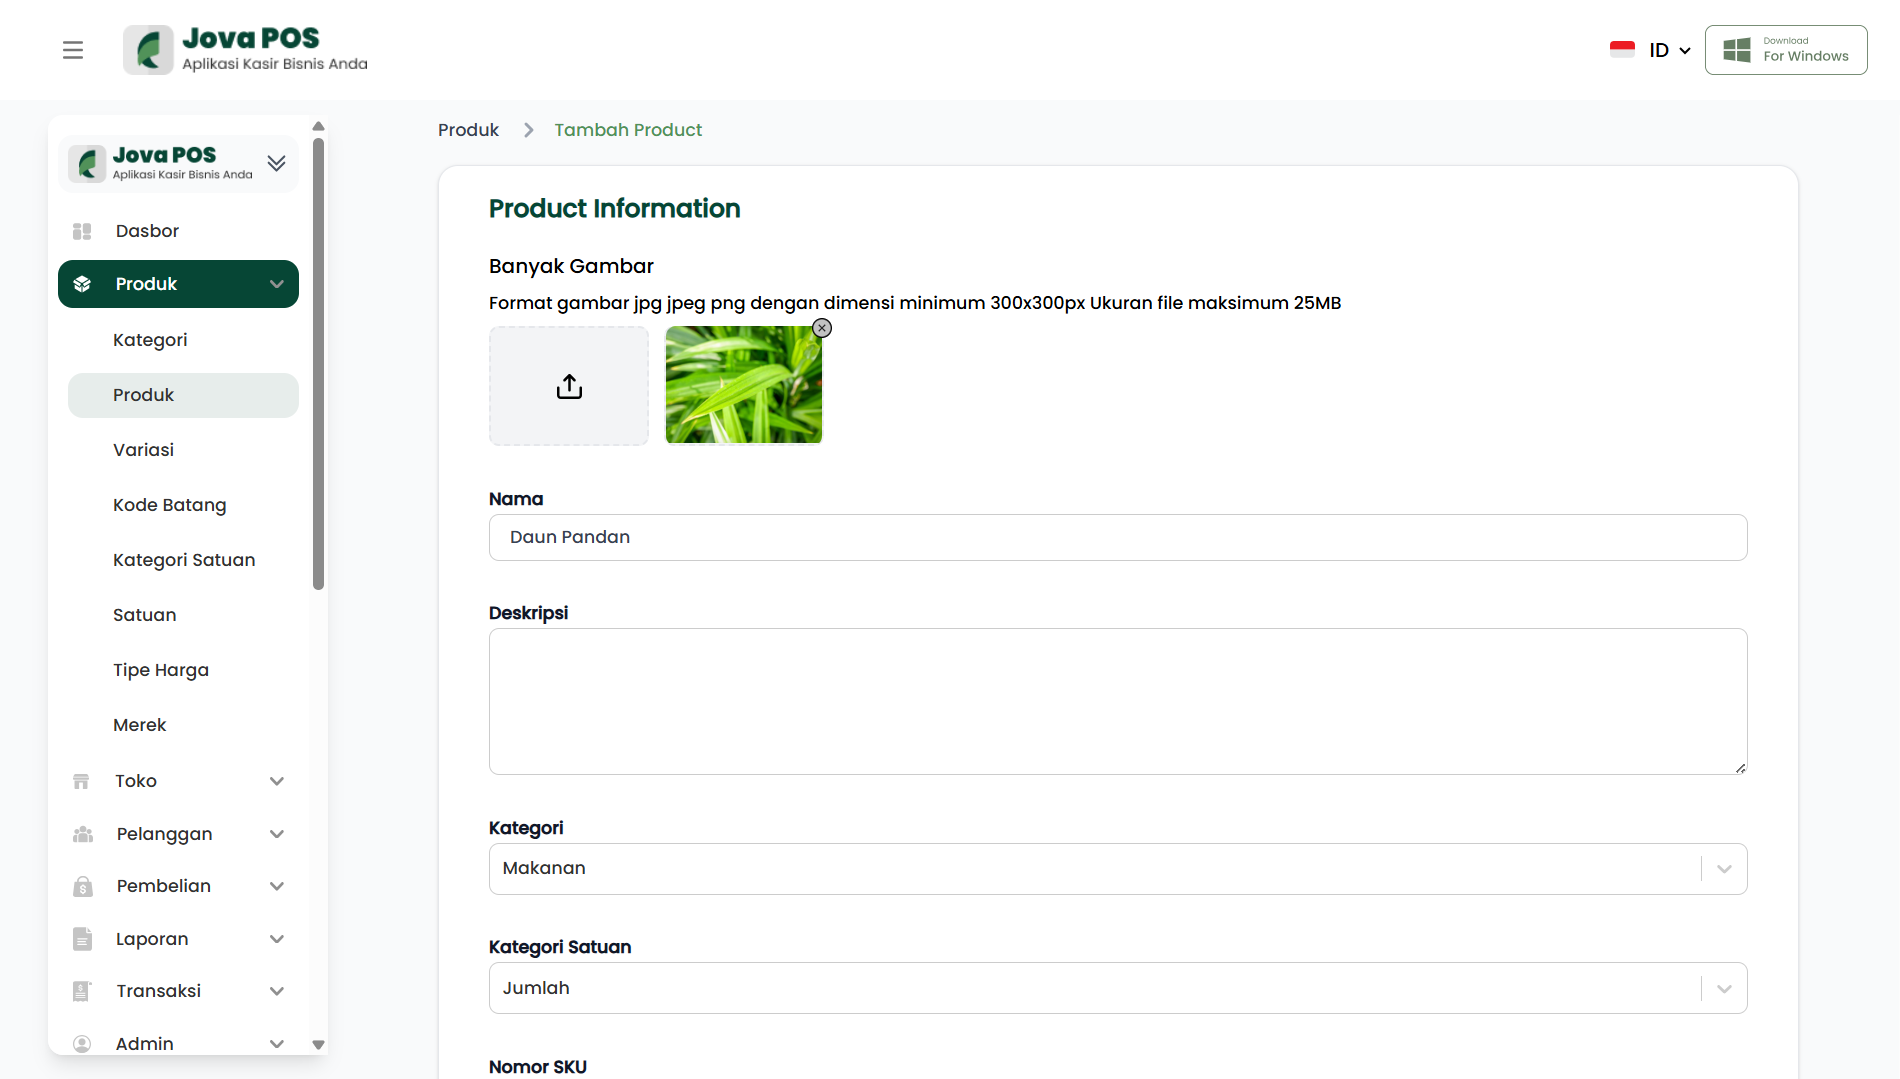
- Select the product category, enter the selling price, stock quantity, and determine the product status.
- Upload a product image according to the guidelines.
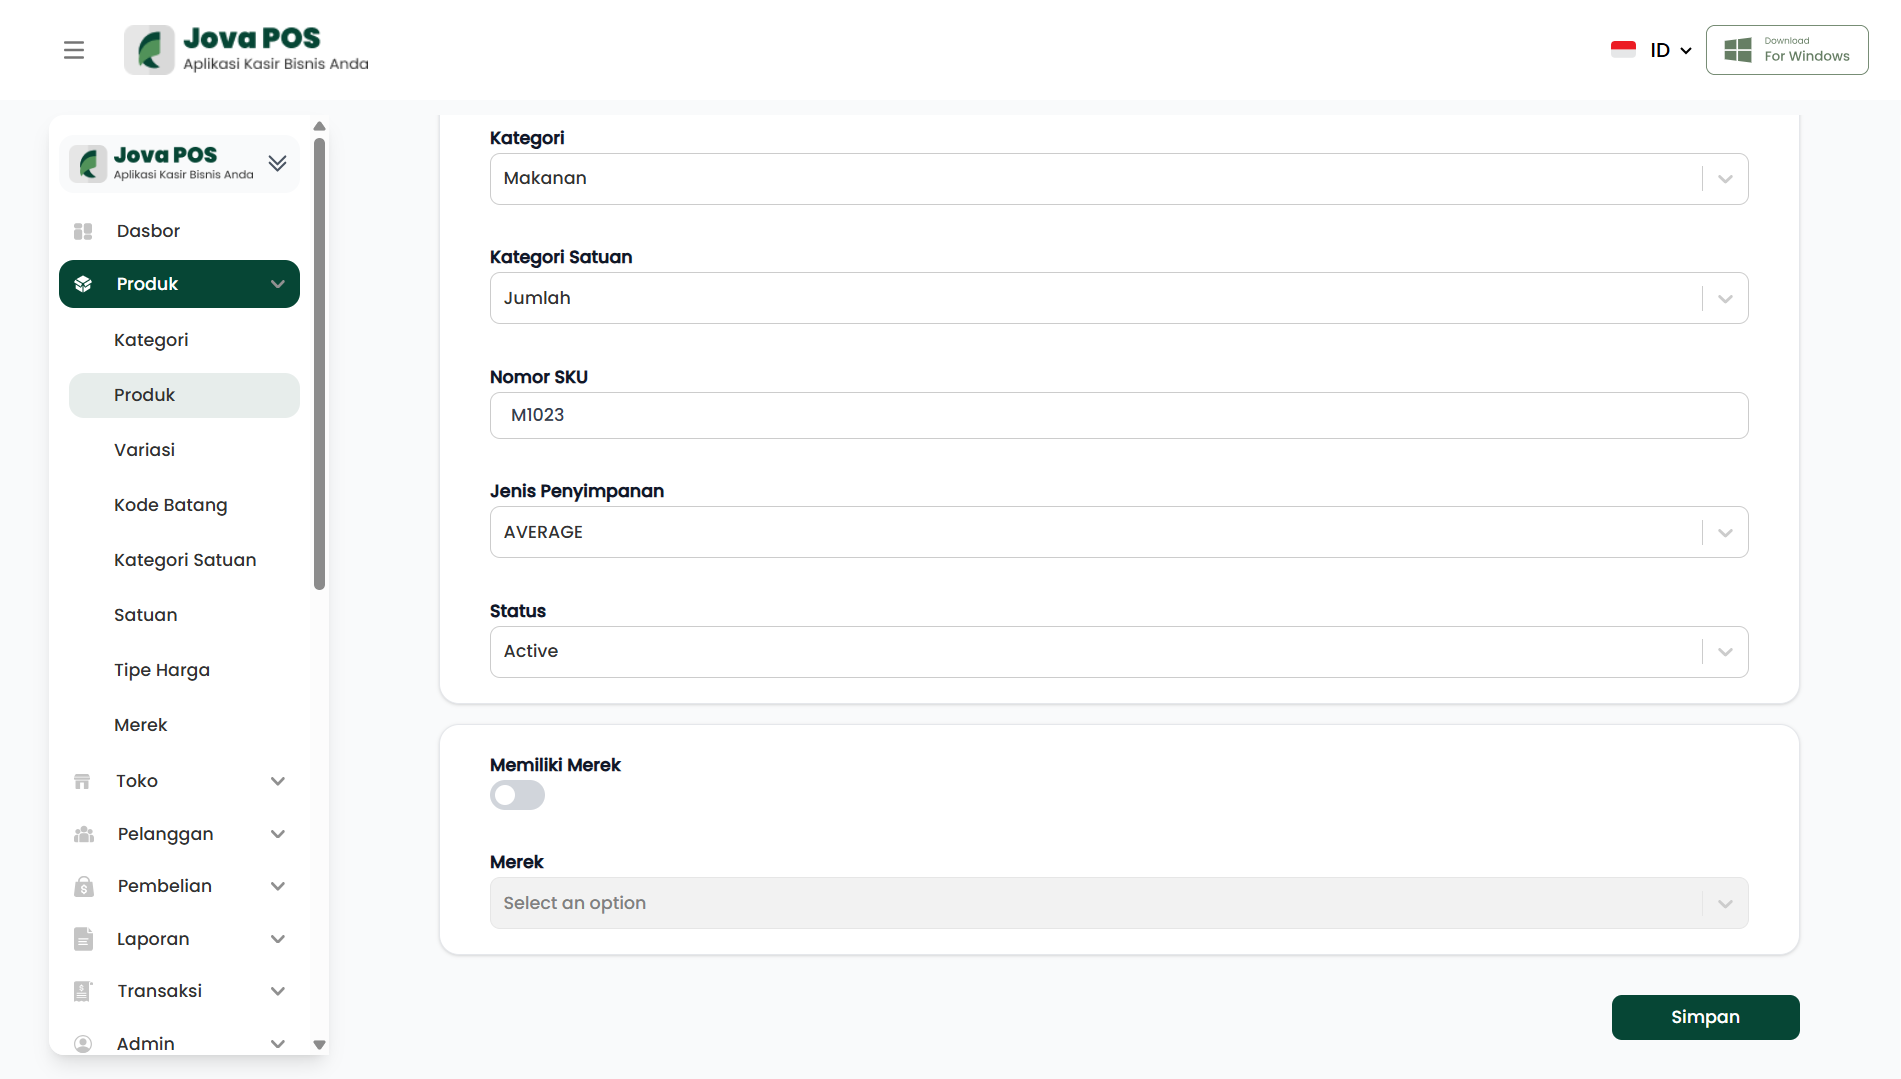
- Click Save after the product data is filled in.
-
Verify and Save
- Make sure all data is correct, then click Save to save the new product to the system.
After successful, the new product will appear in the product list.
Example View
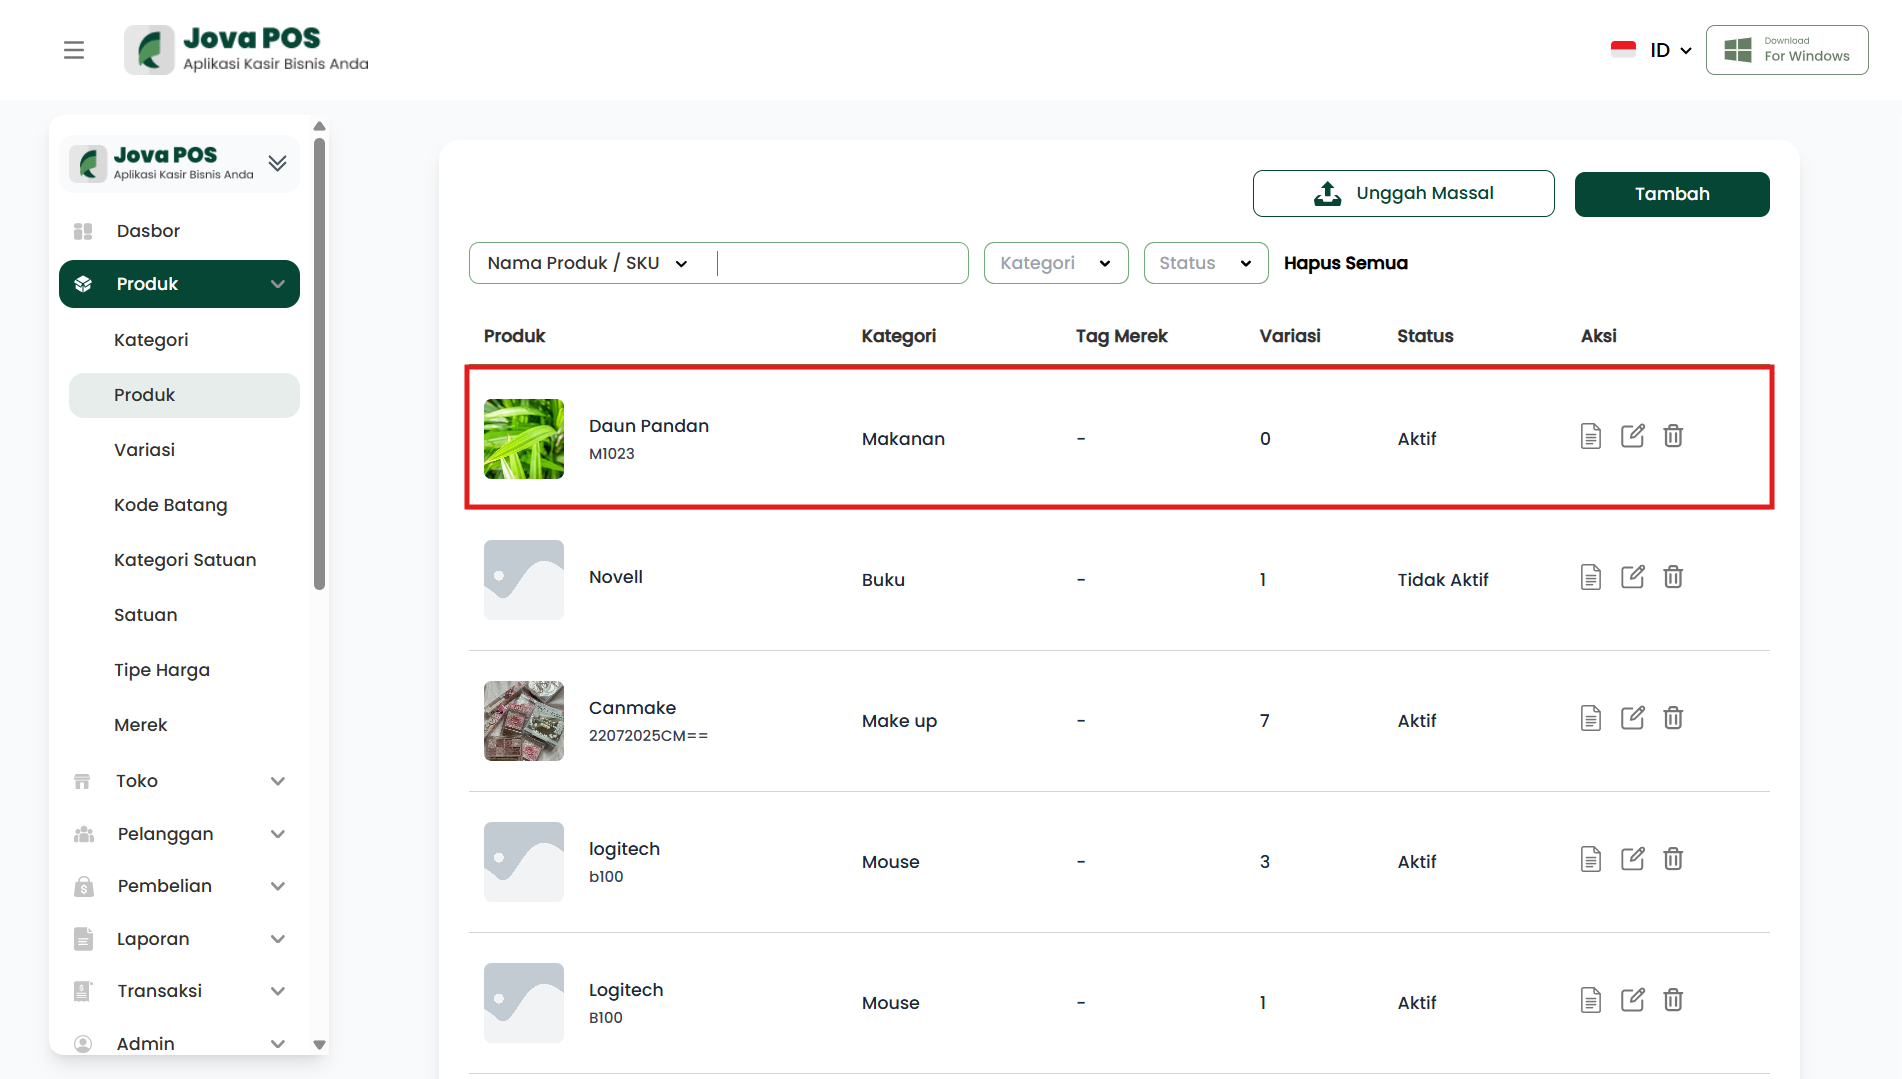
Use clear and easy-to-understand product names for cashiers.
Editing a Product
When is Editing a Product Needed?
- Spelling error in the product name
Edit Product Steps
- Select the product to change
- Click the Edit button
- Change the necessary data
- Click Save
Deleting or Deactivating a Product
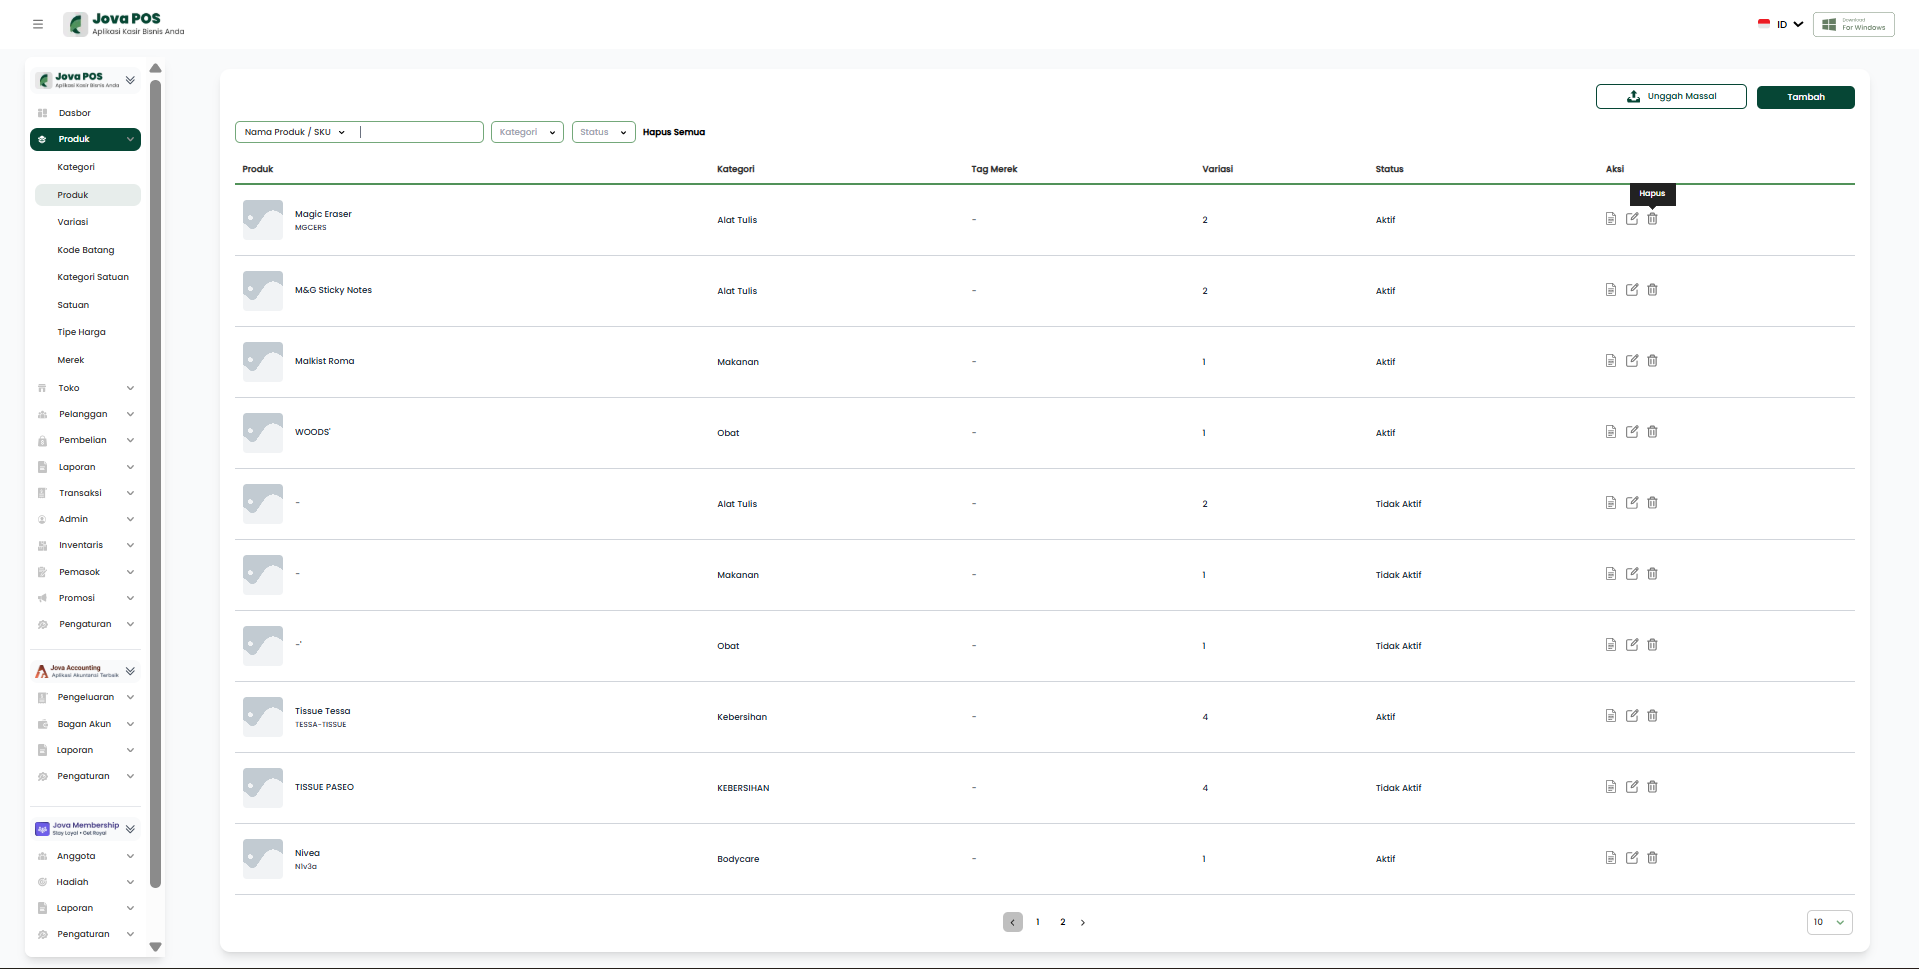
Difference Between Delete and Deactivate
- Delete: Product is permanently removed (if it has never been used in a transaction)
- Deactivate: Product does not appear during transactions
Steps to Deactivate a Product
- Select the product
- Change the status to Inactive
- Save the changes
Inactive products cannot be sold, but remain stored for report purposes.
Relationship Between Products and Categories
Every product must have a category.
Product & Category Relationship Flow
Create Category
     ↓
Add Product
     ↓
Select Category
     ↓
Product Ready for Sale